1. DS Audio Tantra 2
DS Audio Tantra 2 is easily the best FX plugin out there for psytrance and GOA. I’ve tried pretty much every general FX plugin under the sun to nail those authentic psytrance sounds, but honestly, you just end up wasting hours messing with modulation and never quite hitting the mark. With Tantra 2, you get those hypnotic, evolving sounds straight away.
What really sets Tantra 2 apart is the built-in sequencer and arpeggiator. These are made for those hypnotic, trippy patterns and wild rhythmic complexity that define psytrance. The modulation routing is spot on for evolving filter sweeps and pitch automation, so your leads actually stay interesting for the full eight-minute journey. No boring, static loops here. Also huge advantage is that you get hundreds of presets.
- Psychedelic Modulation Matrix
The modulation system is packed with dedicated LFOs and envelopes, all with tempo-sync, so you get that essential rhythmic movement for psytrance.
What I love is how you can assign modulation sources to as many destinations as you want, letting you build those complex, evolving sounds that keep people hooked for the whole track. The modulation depth controls are super flexible too, so you can go from subtle movement to full-on tonal transformation in seconds.
The tempo-synced LFOs are what really lock your sequences to the groove, instead of just sounding randomly modulated. Plus, the modulation visualization actually shows you what’s going on, so you can see exactly why certain settings create those hypnotic patterns. Honestly, having modulation built for 16-bar loops at 145 BPM is a total game-changer compared to synths that are stuck in 4-bar house mode.
- Filter Section Design
Tantra 2 comes loaded with a bunch of filter types, all with aggressive resonance that can self-oscillate for those classic screaming lead tones. The filters are voiced perfectly for the kind of extreme sweeps psytrance needs, but they never get harsh or digital. The filter envelope is super flexible too, with adjustable curves so you can make anything from punchy plucks to slowly evolving pads.
Honestly, it’s the filter resonance that gives this synth its signature acidic vibe. Crank the resonance and you get those howling, screaming sounds you hear in peak-time psytrance, no extra distortion needed. In my opinion, filters that can handle extreme settings and still sound musical are what really set genre-specific synths apart from the usual general-purpose stuff.
- Effects Processing Chain
You get reverb, delay, chorus, phaser, and distortion, all optimized for psytrance production. The delay sync options are especially cool, with dotted and triplet divisions that let you create those polyrhythmic patterns against the straight kick. It’s the little details like this that make Tantra 2 stand out.
2. Xfer Serum 2
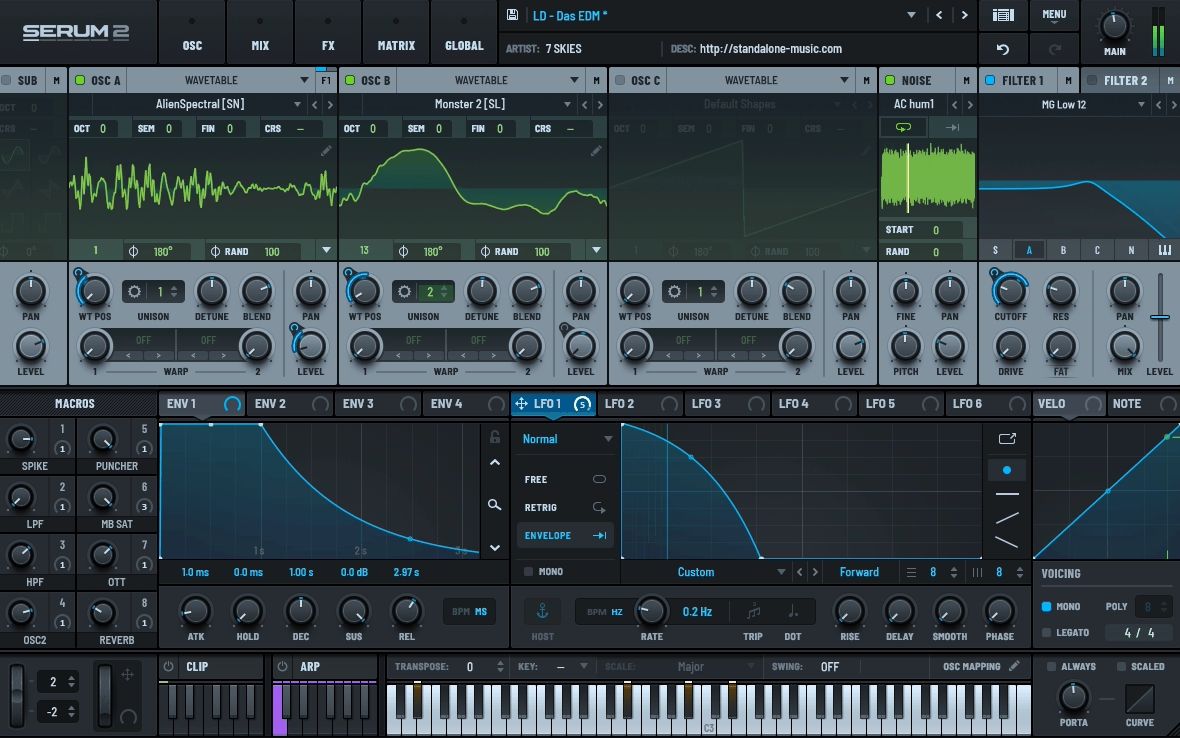
Serum 2 is a no-brainer for almost every list, and for good reason. You can animate between wavetables using LFOs or envelopes, which means you get evolving, moving sounds all within a single note. I love tempo-syncing the wavetable position for those rhythmic, shifting harmonics, perfect for psytrance leads.
And if you can’t find what you want in the included library, just import your own audio or draw up some wild custom shapes in the wavetable editor. The flexibility here is insane.
The real magic is in how smooth the wavetable transitions are, you get these gradual, evolving tonal shifts instead of those jarring jumps you get with basic oscillator switching. For psytrance, this is a game-changer because your sounds keep moving and never feel static. Honestly, just modulating the wavetable position gives you all the evolving character you need, no need to stack up synth layers.
- Chaos Oscillator
The chaos generator is such a cool feature, it lets you add a bit of randomness to things like pitch or filter cutoff. You can dial in just a touch of drift for that analog vibe, or crank it up for more obvious movement. Plus, you can route chaos to literally any parameter, just like any other mod source. Super flexible.
What I love about this is that a little bit of chaos keeps your sounds from feeling too sterile or digital, but doesn’t make things fall apart. Of course, if you go overboard, you can mess up your timing, especially in psytrance where everything needs to be tight. So yeah, use it to add some organic flavor, but don’t go wild unless you want chaos in your mix, literally.
- Modulation System
The drag-and-drop modulation routing works by grabbing a source and dropping it on any parameter. I found this faster than traditional modulation matrices because you can see connections visually. The modulation depth displays on each knob so you always know what’s being affected.
- Filter Types and Routing
Serum 2 comes packed with a filter models, from super clean digital to gritty analog-style types. The best part? You get two filters that can run in series or parallel, and you can modulate them however you want. The filter drive is awesome for adding saturation either before or after the filter, depending on where you put it. Running filters in parallel is a game-changer, you can blend different filter flavors instead of having to pick just one.
From my own experiments, stacking a resonant lowpass with a bandpass filter gives you way more interesting tones than just using a single filter. At the end of the day, having flexible filter routing just opens up a ton of creative options for your sound design.
- Effects Section
The built-in effects rack includes reverb, delay, distortion, chorus, phaser, and more, all designed for electronic music. I found the hyper-dimension effect particularly useful for adding width without phase issues. The effects can be reordered and each has enough parameters to dial in the right processing.
What I love is having all these quality effects built right in, so you can finish your sounds without having to load up any extra plugins. The reverb stays super clear, even with long decays, which is a lifesaver when you want space but not a muddy mix. Having everything in one place just keeps your workflow fast and focused on actually making music.
- Wavetable Library and Import
Serum 2 also comes loaded with hundreds of wavetables, from classic shapes to some really wild, experimental stuff. But honestly, the real power is in the import function, you can just drag in your own audio files and turn them into wavetables. Plus, the processing tools like FFT editing and spectral tweaks let you go way beyond the factory content.
Making your own wavetables from samples is where things get really interesting, you end up with sounds you’ll never find in any preset pack. I seriously recommend playing around with wavetable import, because it takes your sound design way past what’s included. If you want a signature sound, this is the way to get it.
- Sub Oscillator
The sub oscillator is its own beast, running independently with its own waveform and tuning. You can offset it by octaves or tune it to specific intervals, which is super handy. The phase control lets you shape how the sub locks in with your main oscillators for extra punch or movement.
What I love is being able to tune the sub independently, you can lock your bass to the key of your track while letting your leads do their own thing. Even just a little bit of sub detuning adds movement to your basslines without needing extra modulation. Honestly, keeping the sub clean and simple almost always sounds better than overcomplicating it.
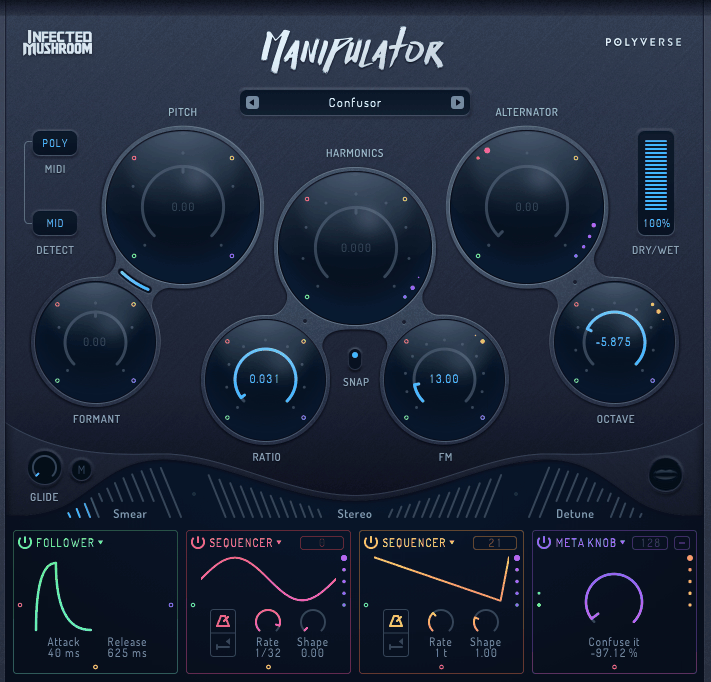
3. Polyverse Manipulator
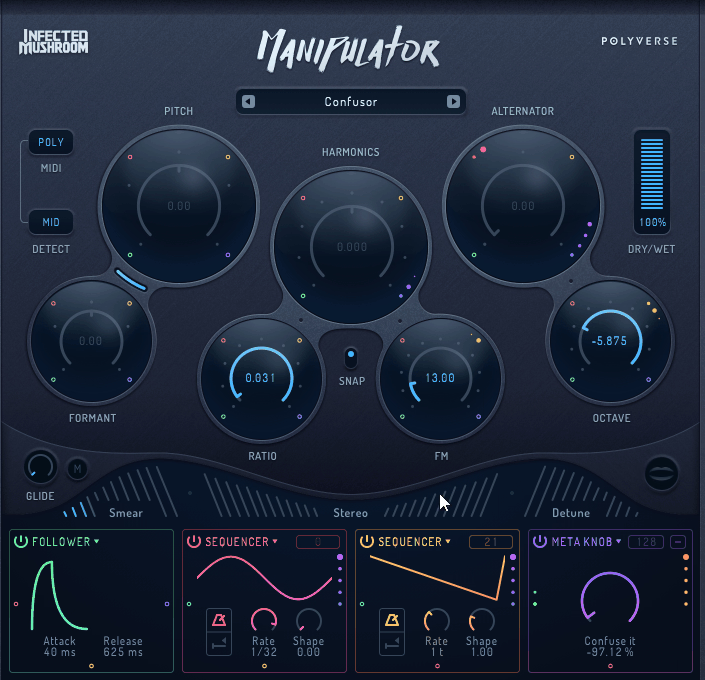
Polyverse Manipulator is an absolute beast when it comes to polyphonic pitch shifting and formant control. Whether you’re working on full mixes or just a single vocal, it somehow avoids all those nasty digital artifacts that usually mess up processed vocals.
The plugin’s approach centers on real-time processing that maintains audio quality even when shifting vocals by multiple octaves. The polyphonic algorithm processes complex audio, including chords and full mixes, without the glitchy artifacts that typical pitch shifters create.
If you’re producing electronic music and love pushing vocals to the extreme, this plugin is perfect. The latency is super low, so you can even use it for live jamming or performances without any annoying lag.
- Polyphonic Pitch Shifting
You don’t need to mess around with separating vocal lines or sticking to monophonic sources. The pitch engine just works, even on full vocal phrases. You can shift things up or down by several octaves and still keep everything sounding clear, which is a lifesaver for those crazy psytrance vocal effects.
The best part? You can shift background vocals or even whole mix elements without having to isolate every single note first. It saves a ton of time compared to those monophonic shifters, and it opens up a whole world of creative options way beyond just lead vocals.
- Independent Formant Control
Formant shifting is totally independent from pitch, so you can get wild with your vocal sounds without messing up the actual notes. Want to turn a normal vocal into something robotic, alien, or just plain weird? The formant range goes far enough to make vocals sound completely synthetic if that’s your vibe.
- Harmonic Generation
Manipulator also lets you add harmonics above or below your original vocal, which is awesome for building thick, lush layers from just one take. You can blend in as much or as little as you want, and suddenly you’ve got instant vocal stacks without having to record a bunch of extra takes.
This is great for building those dense vocal textures in breakdowns. With the right harmonic settings, one vocal line can turn into a full choir in seconds, which seriously speeds up your workflow.
- Real-Time Processing
The low-latency design makes the plugin usable for live performance and real-time jamming. Being able to tweak parameters while audio plays without waiting for processing makes the workflow feel immediate. The CPU usage stays manageable even with extreme settings engaged. Real-time capability separates this from offline processors that require rendering before you hear results.
- Modulation Options
You get LFO and envelope modulation for both pitch and formant, so you can create all sorts of rhythmic vocal effects that lock perfectly to your track’s groove. Whether you want subtle movement or totally wild variations, the modulation controls have you covered. Automated changes mean your vocals can evolve and move without you having to draw in automation by hand. Those classic robotic psytrance vocals? You can nail them with LFO-modulated formants.
4. Polyverse Filterverse
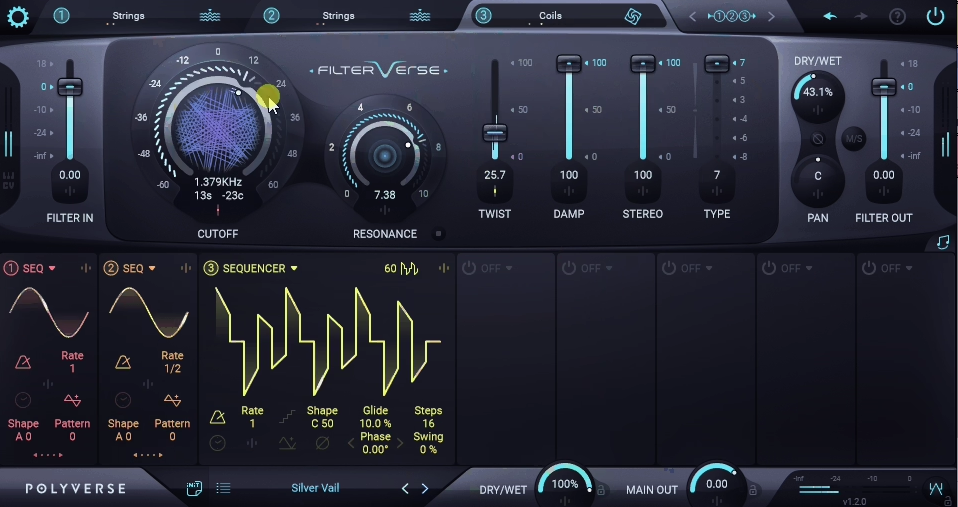
Polyverse Filterverse is a multi-mode filter plugin that takes things way beyond your usual lowpass and highpass filters. What I love about it is the built-in modulation and sequencing, as you don’t have to mess around with external LFOs or automation just to get some movement. Most filter plugins only give you cutoff and resonance, leaving you stuck breaking your workflow if you want evolving sweeps. Filterverse just lets you get creative right away.
You get 26 different filter models here, from your bread-and-butter lowpass and highpass to wild stuff like comb and formant filters. Honestly, the range is nuts because you can do anything from super precise frequency cuts to those screaming, aggressive sweeps. The filter morphing is awesome too, letting you blend between filter types on the fly for some really unique sounds.
What really works here is having all these filter personalities in one place; there’s no need to load up a bunch of different plugins. The vowel and formant filters are especially cool for getting those vocal-style sounds you hear in psytrance. In my experience, just flicking through the filter types helps you nail the vibe for each sound super fast.
- Built-In Step Sequencer
The built-in 16-step sequencer is the main feature as you can control cutoff, resonance, and more in tight, rhythmic patterns. It locks to your project tempo automatically, so your filter movement always grooves with your track. Plus, you can tweak every step, which means you can get crazy complex filter sequences without ever touching external automation.
- Modulation System
You get loads of LFO shapes and envelope followers for modulating pretty much anything. The tempo-synced LFOs are a must for filter sweeps that actually fit your track. And the modulation routing is super flexible as you can send one source to loads of destinations at once, which opens up a ton of creative options.
What stands out is how integrated modulation means you don’t need external MIDI or automation for animated filtering. I noticed that envelope following makes the filter respond to input dynamics, creating expressive filter movement that tracks your audio. You know, this responsiveness adds organic character to filtered sounds.
- Dual Filter Configuration
You can run two filters in series or parallel, each with their own controls and modulation. Stacking them in series gives you those super steep filter slopes for dramatic cuts, while parallel mode lets you blend different filter flavors together. This routing flexibility really changes up your final sound in a big way.
What I love is how having two filters lets you build way more complex frequency shapes than you ever could with just one. For example, stacking a lowpass and a highpass in series gives you super precise bandpass effects, and you get way more control than with a regular bandpass filter.
At the end of the day, flexible routing expands creative possibilities beyond single-filter designs.
- Distortion and Drive
You also get pre- and post-filter distortion, which is perfect for adding grit and aggression. I have to say, the filter drive gives you that classic resonant, screaming sound you hear in psytrance. Where you put the distortion placement before or after filtering affects the final tone differently.
From what I can tell, pre-filter distortion creates harmonics that then get filtered, while post-filter drive adds saturation to the filtered result. I found that moderate drive amounts add warmth and presence without obvious distortion. In many cases, integrated saturation eliminates the need for separate distortion plugins.
- Visual Feedback
The interface displays the filter’s real-time frequency response, showing how it affects your audio spectrum.
5. Polyverse Supermodal
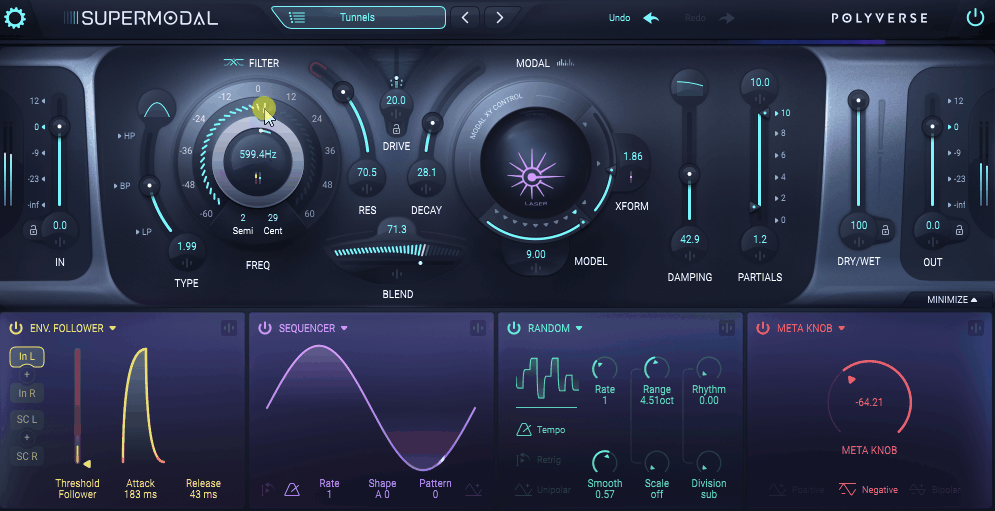
Physical modeling synthesis is all about recreating real instruments by simulating how materials vibrate and resonate. But Polyverse Supermodal flips the script and uses this tech to craft wild and synthetic textures.
Supermodal packs in up to 3,200 resonators you can tune, detune, and modulate, letting you whip up anything from metallic percussion to lush, evolving pads that fit perfectly in a psytrance track.
The best part? You get harmonically rich sounds from scratch, no need for sample packs or boring oscillators. Honestly, the resonator approach gives you timbres that feel super organic and acoustic, even when the end result is totally synthetic.
For psytrance, where texture and harmonic complexity matter as much as rhythm, this offers sound design possibilities that standard subtractive synths don’t reach easily.
- Excitation Sources
You get a bunch of strike and bow models that decide how the resonators get triggered, which totally changes the attack and sustain. I noticed that just swapping the excitation type can make the same resonator setup sound completely different. Plus, you can mess with strike position and hardness for even more variation.
What’s really cool is how the excitation modeling lets you flip between plucked, struck, or bowed sounds using the exact same resonator setup. Just switch the excitation model and you can turn a metallic hit into a smooth, sustained bow sound in a second.
That said, you’ll want to experiment with the excitation controls to really hear how they shape your sound. It’s one of those things you just have to play with.
- Resonator Detuning and Spread
The detune knob lets you shift resonators by tiny amounts for that classic chorusy thickness, or crank it for wild, dissonant chaos. I love how just a bit of detune adds width and depth, no extra plugins needed. The stereo spread is awesome too, throwing resonators across the stereo field based on their frequency.
What really stands out is how the resonator spread gives you natural, wide stereo just by using the sound’s own harmonics. A little detune adds that organic vibe, but if you go heavy, you get these crazy metallic, inharmonic sounds that are perfect for psytrance FX. Honestly, you don’t even need a separate stereo widener with this.
- Filter and Damping
The integrated filtering shapes the resonator’s output tonally, while damping controls determine how quickly the resonator loses energy. I appreciate how damping differs from filtering, affecting the resonator behavior itself rather than just EQing the output. The frequency-dependent damping creates a realistic material simulation.
I love how tweaking the damping can make your sound go from woody and muted to bright and glassy. Crank the damping for thuddy, percussive hits, or back it off for shimmering, ringing tones. At the end of the day, damping and filtering together give you all the tonal control you could want.
- MIDI Velocity Response
Velocity sensitivity changes how hard the resonators get hit, so you get real expressive dynamics. Honestly, messing with velocity makes Supermodal feel like a real instrument, not just another static plugin.
6. Polyverse Gatekeeper
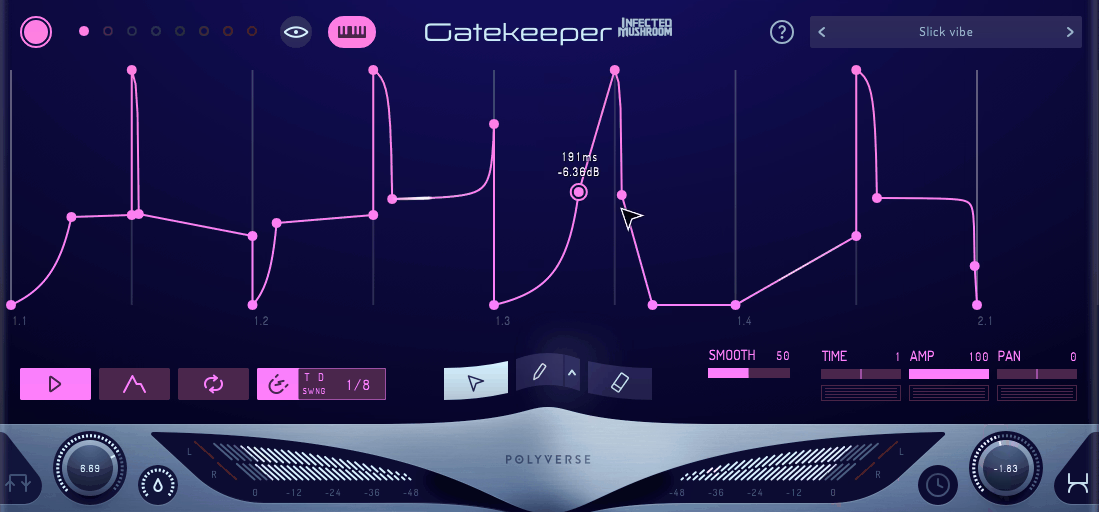
Normally, if you want to do volume automation or gating in electronic music, you end up drawing endless envelope curves or messing around with sidechain setups that just kill your workflow. Gatekeeper flips the script by giving you 8 separate volume envelopes, each one ready to trigger in sync or react to your audio. That means you can get all those stutters, gates, and chopped-up rhythms without having to automate everything by hand or set up a bunch of external triggers.
What makes Gatekeeper so good is that each envelope does its own thing, with its own trigger and curve settings. I found this super useful for getting those choppy, rhythmic psytrance effects on vocals and synths, and you don’t even have to slice up audio or mess with complicated MIDI programming.
If you want flexible, editable rhythmic gating, Gatekeeper keeps everything in one spot instead of making you jump between plugins and automation lanes.
- Step Sequencer Per Envelope
Each envelope comes with its own step sequencer, so you can control exactly when it kicks in. I quickly realized this means you can build super intricate on/off patterns for every layer. You can set the step size anywhere from whole notes all the way down to 64th notes, so you can go from slow pulses to crazy fast stutters.
What really stands out is that every envelope can have its own totally different rhythm. I found that if you offset the step patterns between envelopes, you get these evolving gate sequences that never get boring or repetitive. This kind of flexibility takes basic gating and turns it into full-on rhythmic programming.
- Curve Shaping
You get full control over the attack and release curves, with shapes that go from exponential to linear to logarithmic. I have to say, the curve shape totally changes the vibe of your gating. The visual curve editor is awesome for seeing exactly how your volume moves over time.
From what I can tell, exponential curves create natural-sounding fades, while linear curves produce more mechanical gating. I found that logarithmic release curves work well for percussive material because they match how acoustic sounds naturally decay. Basically, curve control separates musical gating from harsh on/off switching.
- Envelope Blending
You can blend between envelopes for smooth transitions, or just snap between them instantly. I love how crossfading lets you move between different gating patterns with zero clicks or dropouts. The blend mode decides if envelopes stack up or just take over from each other.
What I like is how envelope blending enables dynamic arrangement changes where gating patterns morph over time. From my experience, smooth transitions between sparse and dense gating add movement to breakdowns and builds. At the end of the day, blending options prevent gating from feeling static throughout a track.
- MIDI Control
You can also trigger envelopes with MIDI notes, which basically turns Gatekeeper into a playable volume sequencer. That means you can perform gate patterns live instead of having to program everything ahead of time. The MIDI mapping works with any standard controller, so you get proper hands-on control.
What’s awesome is that MIDI triggering gives you way more performance flexibility than just programming gates. I noticed that playing envelope triggers by hand gives you variations and groove you just can’t get with strict tempo sync. Honestly, MIDI control makes Gatekeeper feel more like an instrument than just another effect.
- Preset System
Gatekeeper comes loaded with presets sorted by gate pattern complexity and musical style. I found the preset browser super helpful for getting a feel for all the different envelope and sequencing combos you can make.
What really stands out is that the presets actually show off real rhythmic gating tricks, not just basic effect settings.
7. Matt Tytel Vital
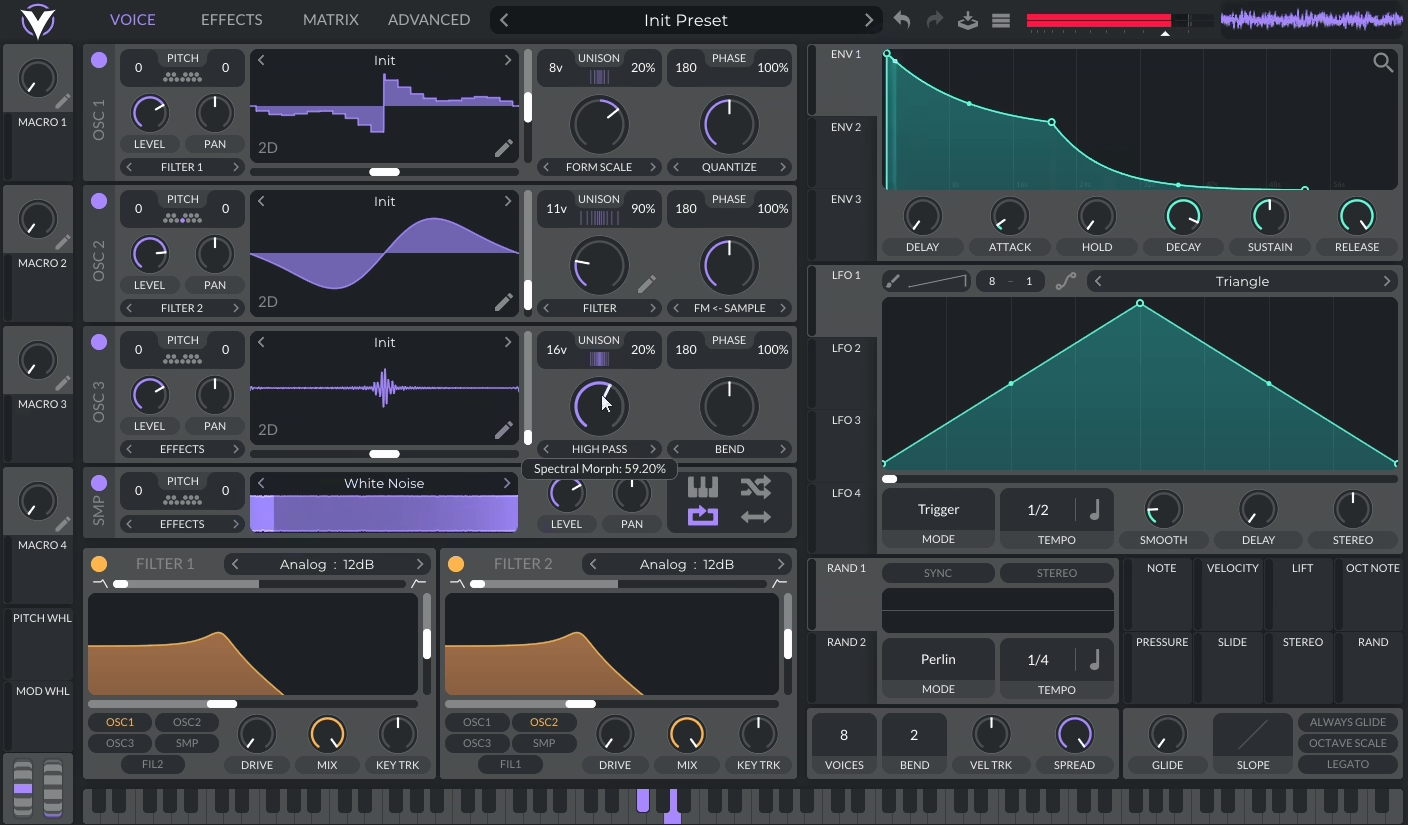
Let’s be real. Most producers hit a wall when they want pro-level wavetable synthesis but can’t splash out on Serum or Pigments. The jump from your DAW’s stock synths to the big paid wavetable beasts is massive, and it leaves beginners stuck with basic tools while they’re trying to learn sound design.
Vital totally changes the game here. It comes with a built-in wavetable editor that lets you load any audio file and turn it into a playable wavetable using a variety of analysis methods. You can even record straight into the editor or just drag in your own samples and get wild with it.
What really sets Vital apart is how easy it makes creating custom wavetables. You don’t need any fancy external editors or paid packs, just load up your own field recordings or synth sounds and you’re off. Honestly, being able to import your own audio is way more important for making unique sounds than having a million factory wavetables. You’ll get timbres you just can’t find in any preset library.
- Filter Algorithms
Vital’s filter section is stacked. You get analog-style filters, combs, formant filters, and even phase modulation filters that go way beyond your usual cutoff sweeps. Each filter type has its own vibe and is perfect for different sound design tricks. Plus, you can run two filters in series, parallel, or even morph between them for extra madness.
Phase modulation filters are especially cool, as they create evolving harmonics you just can’t get with a regular lowpass. Formant filters are awesome for those vocal, talking synth sounds you hear in psytrance. Each filter reacts differently to modulation, so you’ll want to experiment and see what weirdness you can come up with.
- Effects Architecture
Vital packs in 9 effect slots loaded with everything you need, like reverb, delay, chorus, flanger, phaser, distortion, EQ, compressor, and filter. For a free synth, the effects sound seriously good, especially the reverb. It adds space without that weird metallic ring you get in some plugins. You can even slap effects on individual oscillators before they hit the main mix.
The coolest part? You can process each oscillator separately. Distort one, keep the others clean, and suddenly you’ve got these thick, layered sounds that would normally take a bunch of synths to pull off. Having all these effects built in means you don’t have to mess around with extra plugins to get a polished sound.
- Modulation Remapping
Modulation in Vital gets next-level with remapping curves. You can twist and shape how your LFOs or envelopes hit their targets using tools like quantize, bounce, and wave folding. The visual curve editor makes it super clear what’s happening to your modulation, so you can get as wild or precise as you want.
Remapping is a game-changer because you can get crazy complex modulation without needing a million sources or confusing routing. Quantize turns smooth LFOs into stepped sequences, bounce gives you ping-pong movement, and wave folding just gets nuts. It seriously multiplies what you can do with even the simplest mod sources.
- Spectral Warping
Vital lets you modulate the wavetable position with spectral morphing modes that affect harmonics, not just the frames. Spectral warping makes your sounds evolve in a way that feels way more organic than just sliding through a wavetable. You get warp modes like bend, squeeze, mirror, and a bunch more to play with.
The magic is that spectral manipulation adds movement inside a single wavetable frame, so you don’t have to rely on just moving the position. Combine spectral warp with position modulation, and your sounds will keep evolving and stay interesting, even on long notes.
8. Sonic Academy Kick 3
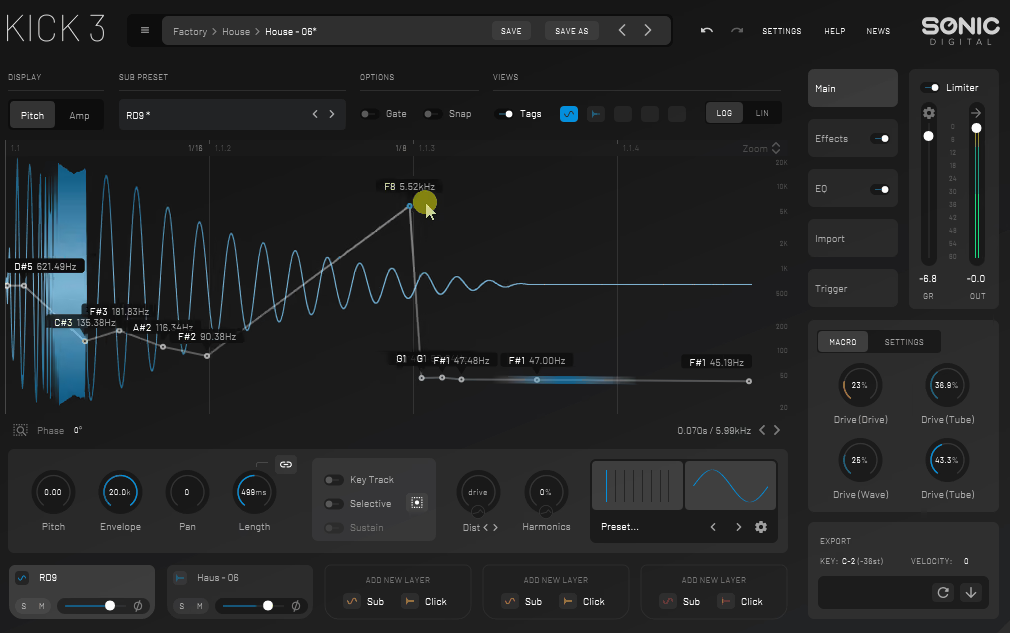
Designing kick drums for psytrance is a real challenge. You need kicks that punch through busy, layered mixes and actually stay in tune with your basslines. Most sample packs just give you generic kicks that either get lost in the mix or totally clash with your track’s key, so you end up stuck in an endless loop of EQ tweaks.
Kick 3 is awesome because it splits the kick into three layers – click, body, and sub, each with its own synth engine. What I love is how you get independent pitch envelopes for each layer, so you can make anything from snappy 808 kicks to those huge, rolling psytrance thumps with long, rumbling subs. The click generator gives you full control over the attack, letting you dial in the perfect snap and tone.
The real magic here is that you can tune the sub exactly to your track’s key, while keeping the click and body wherever you want. This gives you way more control than just EQing a finished sample. Especially in psytrance, getting your kick pitch to match your bassline is what stops all that phase cancellation and muddiness that ruins mixes.
- Pitch Envelope Control
Each layer has its own pitch envelope, so you can shape how the sound drops from the attack to the tail. I’ve found that these pitch curves are what make the difference between a punchy, tight kick and a deep, booming one. You can go from exponential to linear curves, which totally changes how natural and snappy the pitch drop feels.
What really stands out for me is how the sub layer’s pitch envelope gives you that classic psytrance kick, with low-end that rings out just right. Fast pitch drops on the body layer make the attack super punchy, while letting the sub decay a bit slower keeps the low-end fat and present. Honestly, getting these pitch relationships right is the secret to making kicks that actually work in busy mixes.
- Built-In Processing Chain
The plugin also includes compression, EQ, and distortion optimized specifically for kick drum processing. I have to say, the compressor uses attack and release times tailored for transient control without pumping artifacts. The EQ section focuses on frequency ranges that matter most for kicks.
- Key Detection and Tuning
The tuning display shows exactly what note your kick is tuned to, making it easy to match your track’s musical key. I love how pitch detection removes guesswork about whether your kick and bass will clash. The fine-tune controls let you adjust tuning in cents for precise harmonic alignment.
What works is how musical tuning prevents phase cancellation, which creates a weak, undefined low-end. I found that tuning kicks to the root note creates cohesive bass where everything reinforces rather than fights. Basically, proper kick tuning is what separates muddy mixes from tight, powerful productions.
- Velocity Layering
The plugin supports MIDI velocity, which dynamically affects transient intensity and tonal character. I realized that velocity response adds natural variation to programmed kick patterns. The velocity curve shaping determines how much velocity affects the sound.
9. Surge XT
There are some great free music production tools out there thanks to the open-source community, but most free synths either feel half-baked or look like they were designed in 2005 and never touched again. If you want pro-level synthesis without dropping cash, you usually have to put up with missing features or weak sound quality.
Surge XT changes the game by giving you hybrid synthesis, including wavetable, virtual analog, and FM engines all running at once and it’s actually kept alive by a passionate community, not just some company that might drop it next year.
- Hybrid Oscillator System
Each of the three oscillators offers 12 different synthesis algorithms, including classic wavetables, window oscillators, FM modes, and alias generators. I appreciate how switching algorithms per oscillator creates timbral combinations impossible in single-engine synths. The wavetable morphing animates timbres smoothly while FM algorithms add digital aggression.
What works here is that algorithm variety per voice lets you layer smooth pads under aggressive leads within a single preset. From my perspective, combining different synthesis types generates the complex harmonic textures psytrance sound design requires. At least when building evolving sounds, this flexibility eliminates the need to stack multiple synth plugins.
- Scene System Architecture
The synth includes two complete scenes with independent oscillator, filter, and modulation settings that can layer, split, or morph into one another. I realized that scene morphing creates dynamic transitions between completely different sounds using a single crossfade parameter. The morph control accepts modulation, enabling automated sound transformations.
Having two scenes is basically like having two synths in one, and they can interact in ways you just can’t do with separate plugins. Morphing between scenes is what gives you those epic, evolving leads that keep psytrance tracks interesting for minutes on end.
That said, juggling two full synth setups can get a bit overwhelming if you’re just starting out but once you get the hang of it, the creative payoff is huge.
- Modulation Matrix Depth
The plugin supports virtually unlimited modulation routings, with per-connection depth control and multiple sources affecting a single destination. I found the modulation amount visualization helpful for tracking which sources control which parameters. The LFO section offers tempo sync, deformable shapes, and step sequencing that go beyond basic waveforms.
What stands out is how layered modulation, where modulators affect other modulators, creates movement that evolves over long timeframes. I noticed that using envelopes to control LFO rates generates acceleration and deceleration effects useful for psytrance builds. You know, this modulation depth enables the constantly shifting character the genre demands.
- Filter Configuration Options
You get two filter slots per scene, and you can run them in series, parallel, or a bunch of other cool routing options. The filter selection is massive with everything from super clean digital filters to fat, resonant analog-style ones. You can even do stereo and mid-side processing for extra width and control.
What I appreciate is how running filters in parallel with different types creates unique tonal characteristics that single filters can’t achieve. From my experience, combining lowpass and bandpass filters in parallel yields more focused frequency responses with greater control than standard filter designs. At the end of the day, flexible routing significantly expands creative possibilities.
- Active Development Model
Being open-source means the synth receives regular updates with new features, bug fixes, and improvements driven by user feedback. I have to admit, ongoing development keeps Surge XT evolving rather than becoming stagnant, abandoned ware. The user forum and documentation provide support resources that are on par with commercial products.
What I appreciate is how feature requests come directly from producers using the synth rather than corporate roadmaps. From my perspective, community-driven development means improvements that address actual workflow needs. In the long run, this approach creates a synth that adapts to what producers actually need rather than marketing department decisions.
I created ModulateBass to share the latest updates on top-quality plugins with you. Most plugins featured here offer trial versions, and when you buy through retailers like PluginBoutique, Native Instruments, or Plugin Alliance, you help keep this site running through commissions without paying anything extra.
I only showcase plugins I actually use or would genuinely choose for my own work. Price tags don’t influence my recommendations. If I love a plugin, I’ll feature it regardless of cost. For pricier options, I always suggest trying the demo first when possible. Trial versions typically include full functionality, giving you a complete experience before committing. I hope my content proves valuable for your needs. Thanks for stopping by.